How to Tin a Soldering Iron: First Use & Re-Tinning
12 min
- Quick Answer: How to Tin a Soldering Iron
- What Tinning Actually Does (and Why a Dry Tip Fails)
- What You Need to Tin a Tip
- How to Tin a New Soldering Iron Tip for the First Time
- How to Re-Tin the Tip During a Soldering Session
- The Right Temperature: Leaded vs Lead-Free Solder
- How to Revive an Oxidized or Dewetted Tip
- Tin Before Storage: Idle and Shutdown Habits
- Common Tinning Mistakes and How to Fix Them
- When to Replace the Tip Instead of Tinning It
- FAQ about Tinning a Soldering Iron
- Conclusion: How to Tin a Soldering Iron for a Longer Tip Life
Key Takeaways
Tin from the first heat-up: Bring the iron to roughly 315–370 °C (600–700 °F), wipe the tip on brass wool, and melt fresh flux-cored solder onto every working face until a thin mirror-bright film covers it, then wipe away the excess and lay down one more light coat.
Re-tin by condition, not the clock: Keep a film of solder on the tip at all times, re-tin the moment wetting turns patchy, and lay down a generous coat before shutdown so oxidation cannot start while the iron sits idle.
Never abrade a plated tip: Filing or sanding breaches the iron plating and exposes copper that dissolves into molten solder, so revive dull tips with gentle flux cycles and sparing tip tinner, and replace the tip when the plating is damaged.
A properly tinned tip melts solder promptly, transfers heat well, and stays useful longer. A dry, oxidized tip can be fully hot yet struggle to melt solder where it touches the joint.
Tinning is the thin, continuous film of solder you keep on the tip's working faces. This guide covers how to tin a soldering iron the first time you use it, how to re-tin as you work, what temperature actually matters, how to revive a tip that has gone dead, and how to store the iron so tomorrow's first joint is as clean as today's last one.
Quick Answer: How to Tin a Soldering Iron
To tin a soldering iron, bring it to roughly 315–370 °C (600–700 °F), wipe the tip on brass wool, and melt fresh flux-cored solder onto every working face until a thin, mirror-bright film covers it. Wipe away the excess and lay down one more light coat. Re-tin any time wetting turns patchy, and always before switching the iron off.
What Tinning Actually Does (and Why a Dry Tip Fails)
The solder film fills tiny gaps between the tip and the workpiece, creating a thermal bridge. Without it, a hot tip has much less effective contact. Holding the iron against a pad longer can then overheat the board before the joint flows properly.
That film also shields the working surface from oxygen. A bare hot face can oxidize quickly, making fresh solder bead up instead of spreading.
HAKKO's tip-life guidance explains the construction: a conductive copper core protected by iron plating. Filing or sanding can breach that plating and expose copper that dissolves into molten solder. Never file or sand a plated tip.
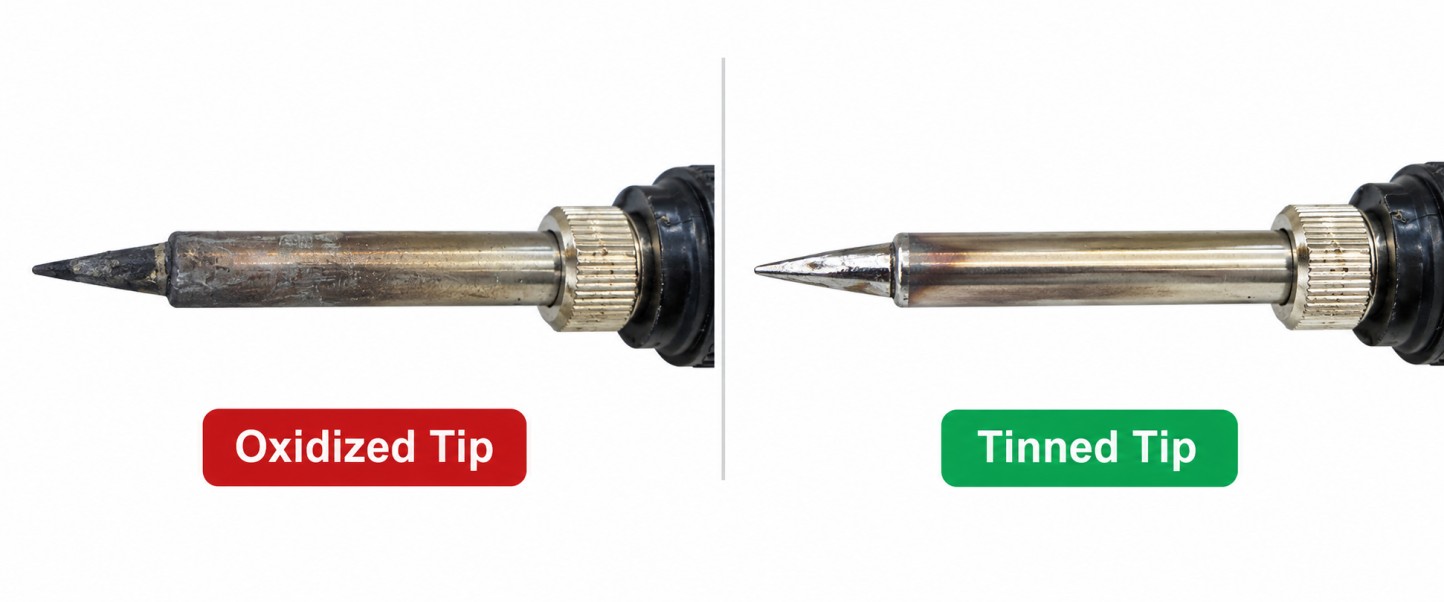
Tinned vs oxidized soldering iron tip comparison
What You Need to Tin a Tip
Have these basics within reach:
- A temperature-controlled iron, compatible tip, and stable stand.
- Electronics-grade, rosin flux-cored solder matched to the intended leaded or lead-free process.
- Brass wool for soldering iron tips, or a clean cellulose sponge dampened with distilled water.
- A compatible tip tinner, reserved for recovery when ordinary re-tinning fails.
Use fume extraction, eye protection, and a heat-resistant work surface. Wash your hands after handling solder, especially leaded alloys.
For equipment selection, see the electronic solder kit beginner's guide andSMD soldering tools guide.
How to Tin a New Soldering Iron Tip for the First Time
This is the routine that answers how to tin a soldering iron the very first time it comes out of the box:
- Fit the tip while the iron is cold, seat it fully, and set a moderate temperature — there's no need to jump straight to maximum heat.
- As the iron reaches temperature, feed flux-cored solder onto every working face, not just the point, until the surface wets evenly and turns bright and shiny.
- Wipe the excess off on brass wool and lay down one more thin film. You're aiming for a mirror-shiny coat with no bare copper visible anywhere on the tip.
- If any patch stays dull after step three, repeat steps two and three on that spot rather than pressing harder or turning up the heat.
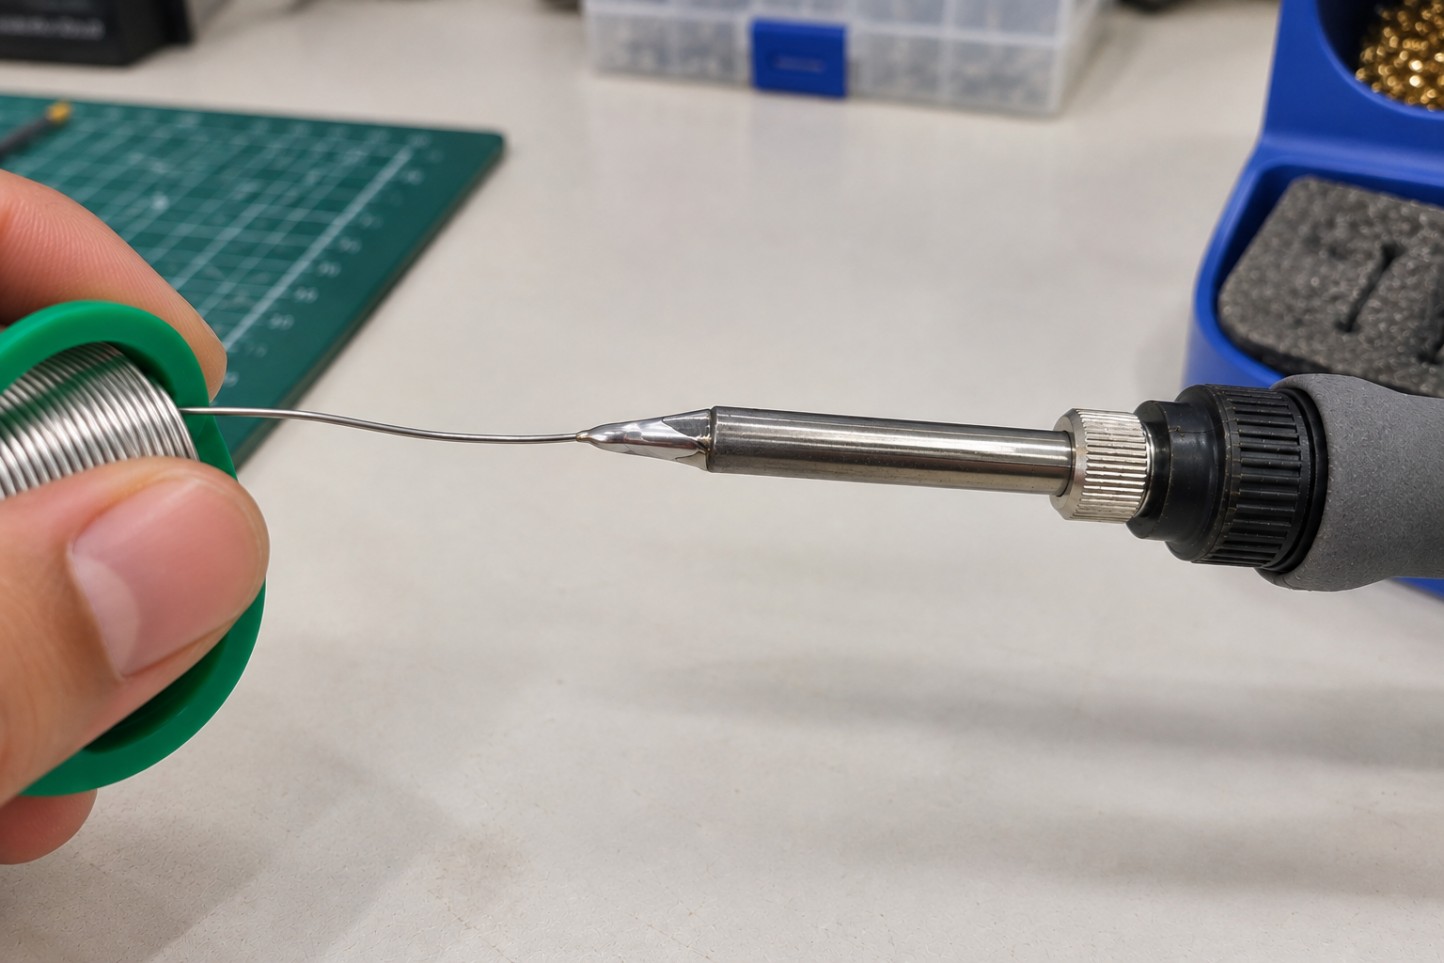
Applying solder to a new soldering iron tip
How to Re-Tin the Tip During a Soldering Session
Tinning isn't a one-time event tied to a new tip — it's a habit repeated all session long, whatever the job.
Between joints, shake off the excess solder, wipe the tip on brass wool, and lay down a fresh film before setting the iron back in its stand.
Re-tin the moment wetting turns patchy or solder stops flowing cleanly — a few seconds of light tinning now beats aggressive scrubbing later.
Keep flux in the loop. Flux-cored solder already slows oxidation on its own; if solder won't wet, add a touch more flux rather than reaching for more heat.
For technique beyond tip care, read these12 professional soldering tips and tricks.
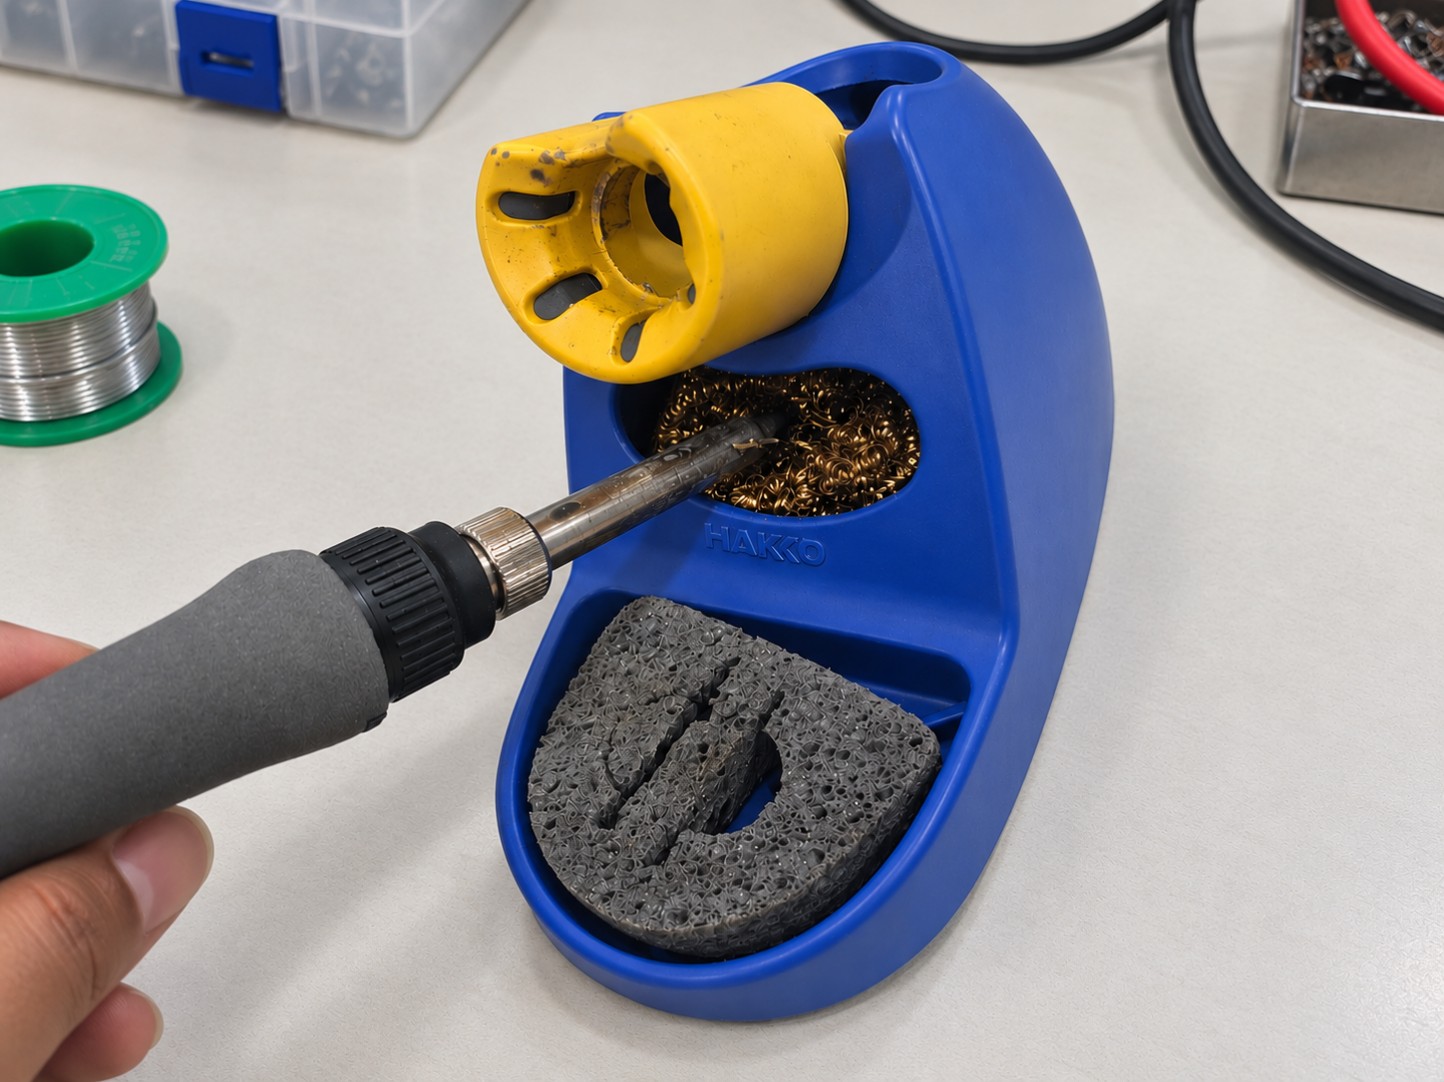
Cleaning soldering iron tip on brass wool
The Right Temperature: Leaded vs Lead-Free Solder
Work around 315–370 °C (600–700 °F) for most electronics — use only as much heat as the joint actually needs.
Don't exceed roughly 425 °C (800 °F). Extra heat doesn't improve a joint; it accelerates tip oxidation and shortens the tip's working life.
Lead-free solder needs a bit more heat and faster technique, plus a lead-free-rated tip — running lead-free solder on a leaded-only tip wears it out noticeably faster.
| Solder Type | Working Range | Do Not Exceed |
|---|---|---|
| Leaded (Sn63Pb37 / Sn60Pb40) | 315–370 °C (600–700 °F) | ~425 °C (800 °F) |
| Lead-Free (SAC alloys) | ~370–400 °C (700–750 °F) | ~425 °C (800 °F) |
Kester's technical data sheet for its 268 flux-cored wire (PDF, Issue 17 May 2021) sits inside this range. Under Process Considerations it gives tip temperatures of 315–343 °C (600–650 °F) for leaded alloys and 371–400 °C (700–750 °F) for lead-free alloys.
The same data sheet tells you to heat the pad and lead first, then feed the wire to the joint instead of the tip. Tinning is the one deliberate exception, because there the tip is the part you want coated.
How to Revive an Oxidized or Dewetted Tip
Try the gentle cycle first: lower the temperature, apply fresh flux-cored solder, wipe on brass wool, and reapply — repeat a few short cycles rather than one long scrub.
If it still won't wet, dip the tip briefly (2–4 seconds) in tip tinner, wipe, and tin again. Use tip tinner sparingly — its aggressive flux degrades plating over repeated use, so needing it often is a sign of running too hot, sitting idle too long, or a worn tip.
Note
Never file or sand a plated tip. Save abrasion, if ever, for a tip you're already planning to replace.
Reviving a tip is only half of tip care — the other half is the day-to-day wipe-and-clean routine covered in the companion guide,How to Clean a Soldering Iron Tip, and it's worth reading alongside this one.
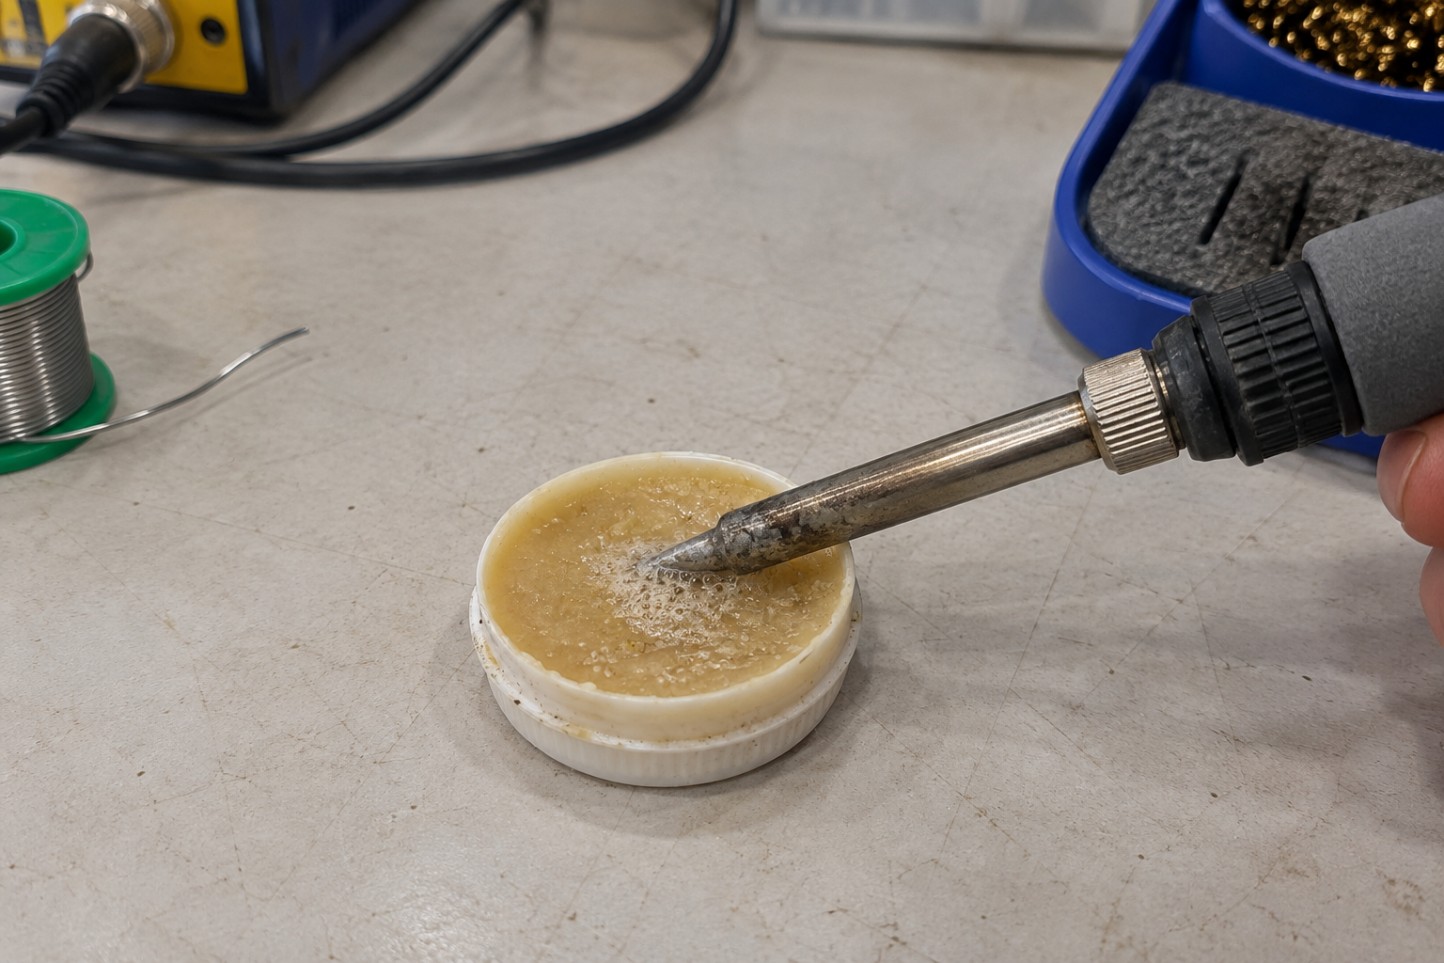
Using tip tinner to revive an oxidized tip
Tin Before Storage: Idle and Shutdown Habits
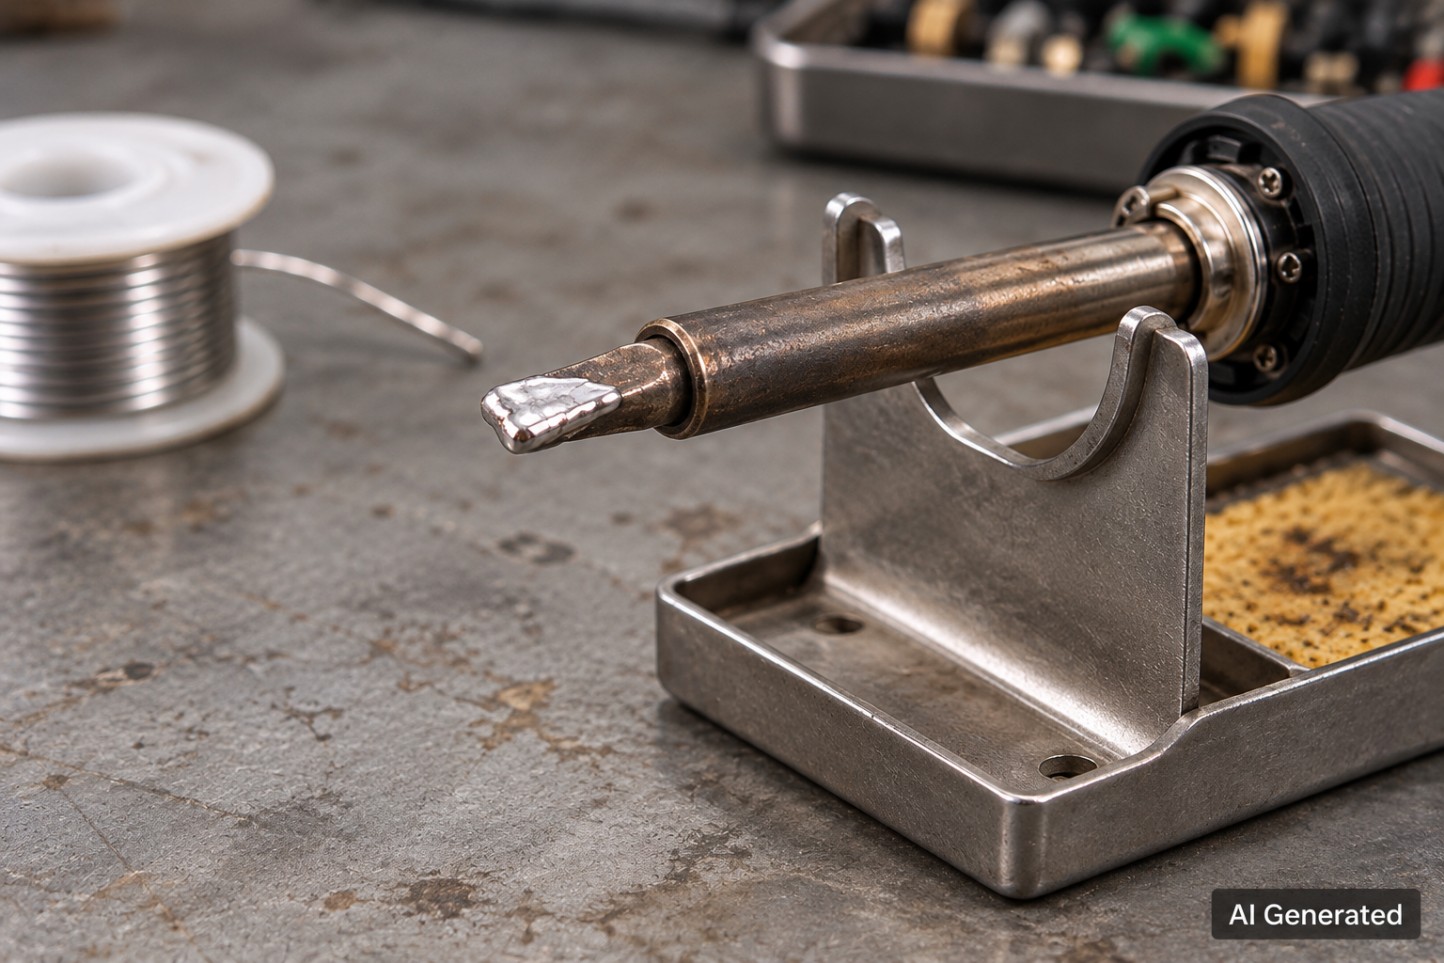
Before shutdown, clean the tip and lay on a generous coat of solder — almost a visible ball — and let it harden in place. That coat is what blocks oxidation while the iron sits idle.
During a work session, use the station's sleep or standby mode, and switch the iron off entirely for longer idle stretches — heat with nothing to do is what drives oxidation fastest.
Prefer brass wool over a wet sponge for routine wiping. Sponge contact drops the tip's temperature suddenly, and that repeated thermal shock can pit the tip's surface over time.
Soldering iron tip coated in solder for storage
Common Tinning Mistakes and How to Fix Them
- Problem: The tip won't take solder at all. → Fix: It's oxidized — run the gentle flux-and-brass-wool cycle, then tip tinner if that doesn't clear it. Add flux, not heat.
- Problem: The tip oxidizes again within minutes. → Fix: It was left dry or run too hot — keep a solder film on it at all times and drop the set temperature.
- Problem: Someone sanded or filed the tip. → Fix: The plating is damaged. Stop using abrasives immediately; if bare copper is visible, the tip needs replacing, not tinning.
- Problem: Solder beads up instead of wetting. → Fix: No flux, or a dirty sponge — switch to flux-cored solder and clean brass wool or a distilled-water sponge.
- Problem: A leaded tip wore out fast on lead-free solder. → Fix: Wrong tip for the alloy — use a lead-free-rated tip with lead-free solder.
- Problem: The tip cools too much every time it's wiped. → Fix: A wet sponge is shocking it — switch to brass wool, which cleans without the temperature drop.
When to Replace the Tip Instead of Tinning It
Tinning can't fix a tip with a hole, exposed copper, cracked plating, deep erosion, or a deformed working face — replace it instead.
If tinning keeps failing on the same tip no matter what you try, that's usually the tip telling you it's worn out or that the iron has been running too hot. A new tip is often faster than another revival attempt.
Once a tip is replaced and holding a clean tin, the same care applies whether you're doing quick touch-up joints or working through a full PCB reflow soldering setup at home with a solder paste stencil.
FAQ about Tinning a Soldering Iron
Q: How often should I re-tin my soldering iron tip?
There's no fixed schedule — tin by condition, not the clock. Re-tin the moment solder stops flowing smoothly onto a joint or the tip's surface looks dull instead of shiny. In practice, that often means a light re-tin every few joints during dense work, and always a fresh coat before the iron goes back in the stand or gets switched off.
Q: Can I tin a soldering iron without flux?
Not reliably. Flux strips the thin oxide layer from the tip and the solder as you work, which is what lets solder actually wet the metal instead of beading up. Bare wire with no rosin core, or a tip with dried-out flux residue, tends to ball and roll rather than spread — always use fresh flux-cored solder for tinning.
Q: Why does a brand-new tip already look tinned in the package?
Most manufacturers ship tips with a light protective coat of solder or plating to prevent oxidation during storage and shipping. That factory coat is thin and isn't meant to be your working tin — heat the tip and run through the first-tin steps anyway, so the working faces get a proper, even film before you start soldering.
Q: Is it normal for a soldering iron tip to turn black soon after use?
A little darkening at the edges over time is normal wear. A tip that turns fully black and dull, and refuses to wet within minutes of tinning, is oxidizing faster than it should — usually from running too hot or sitting idle at temperature. Lower the set temperature, tin more frequently, and check whether the iron is left on between joints unnecessarily.
Q: Does using tip tinner too often damage the tip?
Yes, over time. Tip tinner works because its flux is more aggressive than standard rosin-core solder, which is exactly why it strips oxidation so well — but that same aggression slowly wears down the tip's plating with repeated use. Treat it as a recovery tool for a dead tip, not a routine cleaning step.
Q: Do temperature-controlled stations need less tinning than basic irons?
They need less rescue tinning, but not less routine tinning. A station holds a set temperature instead of drifting hot between joints, which slows oxidation and makes wetting more predictable. You'll still tin a new tip, re-tin during long sessions, and coat it before storage the same way — the station just makes each cycle behave more consistently.
Q: Can You Tin a Small Conical Tip Like a Chisel Tip?
Yes; both need a continuous solder film over their intended working area. A conical tip may hold very little solder, so watch for even wetting instead of trying to create a visible ball during use. If a small tip struggles with a large pad, improve tip-to-pad contact before increasing temperature.
Q: Can One Tip Be Used for Both Leaded and Lead-Free Solder?
Often yes, mechanically, but separate dedicated tips are preferable when lead contamination matters. Confirm with the manufacturer that the tip supports the chosen alloy and temperature. Wiping off visible solder does not certify that a previously leaded tip is lead-free. For controlled lead-free assembly, keep tips, cleaning materials, and solder clearly separated and follow the process requirements rather than judging compatibility by appearance.
Conclusion: How to Tin a Soldering Iron for a Longer Tip Life
Learning how to tin a soldering iron comes down to a repeatable habit: tin a new tip properly, re-tin as you work, run the temperature the job actually needs, revive gently when a tip goes dull, and store it with a solder coat on. Two rules carry most of it — keep a film of solder on the tip at all times, and never touch a plated tip with an abrasive. Follow that loop and a decent tip will outlast several bad habits' worth of soldering.
Keep Learning
How to Tin a Soldering Iron: First Use & Re-Tinning
Key Takeaways Tin from the first heat-up: Bring the iron to roughly 315–370 °C (600–700 °F), wipe the tip on brass wool, and melt fresh flux-cored solder onto every working face until a thin mirror-bright film covers it, then wipe away the excess and lay down one more light coat. Re-tin by condition, not the clock: Keep a film of solder on the tip at all times, re-tin the moment wetting turns patchy, and lay down a generous coat before shutdown so oxidation cannot start while the iron sits idle. Never......
DC Jack Soldering: How to Solder a DC Barrel Jack / Power Connector
Key Takeaways Confirm polarity before the iron touches the board: Check the adapter label, device marking, and jack pinout for center-positive versus center-negative wiring, because reversed polarity can destroy a regulator or microcontroller instantly. Deliver enough heat for the big joints: DC jack terminals are high-mass, so use a larger chisel or bevel tip, more heat or dwell, and flux until solder fills the plated hole and leaves a shiny fillet instead of a dull, grainy surface. Build in mechanic......
How to Solder an Audio Jack to a PCB
Key Takeaways Confirm the exact pinout first: TS, TRS, and TRRS jacks differ in conductor count and PCB terminal numbering, and TRRS wiring follows CTIA or OMTP standards, so always map every pin from the manufacturer datasheet and PCB footprint before soldering. Control heat and solder: Use a fine-tip iron, flux, and a minimal amount of solder, tack one pin to keep the jack flush and square, then solder each contact pin by pin to prevent bridges between closely spaced terminals. Finish and verify: So......
How to Solder SMD LEDs: A Step-by-Step Guide for Iron, Hot Air, and Reflow
Key Takeaways Confirm polarity and orientation first: Identify the anode and cathode before applying any heat, because a reversed SMD LED will not light and correcting it costs another thermal cycle. Match the method to the job: A fine-tip iron suits one or a few LEDs, hot air is best for rework and single-part replacement, and solder paste with reflow is fastest for complete boards. Keep solder and heat minimal: A small, fully wetted fillet and short dwell times protect the LED die, phosphor, and enc......
How to Solder a Potentiometer (PCB, Panel & Guitar Pots)
Key Takeaways Identify the wiper terminal: In most potentiometers, the middle pin is the wiper. Always verify with a multimeter before soldering. Pre-tin surfaces: Tin both the terminals and wires before joining to ensure strong, clean solder joints. Control heat carefully: Use a temperature-controlled iron and keep contact time short (below 260°C for a few seconds) to avoid damaging the internal resistive track. Test after soldering: Always check continuity and sweep the shaft while measuring output ......
How to Solder QFN Components: A Step-by-Step Guide
Key Takeaways A solder paste stencil is the most reliable way to achieve consistent QFN solder joints. Always use a window-pane paste pattern on the center thermal pad instead of one large paste deposit. Control solder paste volume to prevent floating, bridging, and excessive voiding. Reflow needs a proper soak-then-reflow-then-cool profile Hand soldering is practical only for certain QFN packages and usually cannot solder the center thermal pad effectively. Because QFN solder joints are hidden beneat......