SMT Stencil Cleaning Guide: Process, Frequency, and Tips
12 min
- What Is SMT Stencil Cleaning?
- Common Problems Caused by Clogged Stencil Apertures
- The Physics of SMT Stencil Cleaning: Transfer Efficiency
- How to Clean Solder Paste Stencils: Manual vs Automated
- Stencil Cleaning Frequency: How Often Is Enough?
- Best Practices for a Reliable Stencil Cleaning Process
- Why JLCPCB Stencils Offer Superior Cleaning Durability
- Frequently Asked Questions (FAQs) about SMT Stencil Cleaning
- Conclusion: Making SMT Stencil Cleaning the Foundation of Print Quality
Key Takeaways about SMT Stencil Cleaning
-
SMT stencil cleaning removes solder paste residue from aperture walls and the stencil underside, keeping paste transfer efficiency between 80% and 100%.
-
Industry analysis attributes over 60% of SMT defects to the paste-print step — most of which trace back to a stencil cleaning lapse.
-
Two stages matter: under-screen cleaning (between cycles, typically every 5–10 prints) and off-line cleaning (after production completes).
-
IPA handles standard flux residue; dedicated SMT cleaners handle hardened paste. Lint-free wipes are non-negotiable for fine-pitch boards.
-
Fine-pitch designs (0.4 mm BGA, QFN) need tighter intervals. Nano-coated stencils can extend cleaning intervals beyond 20 print cycles.
-
Inadequate cleaning produces four recurring defects: solder bridging, insufficient deposits, solder balls, and inconsistent paste geometry — all visible at AOI.
-
Stencil hardware matters too: electropolished apertures, nano-coating, and ultrasonic-resistant adhesive extend the usable lifespan of any cleaning routine.
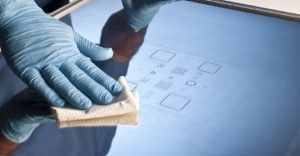
The SMT assembly is clearly indicated to have a concentration of defects at the printing stage. More than 60% of SMT defects are caused by solder paste printing errors, according to industry analysis. The quality of the paste deposition on each and every run of PCB is directly impacted by SMT stencil cleaning. The accumulation of residue alters the geometry of the aperture and introduces errors in the transfer.
Precision of laser aperture is maintained for production cycles by stencil maintenance, which is ±0.003mm. Clean solder paste stencil surfaces ensure that the solder paste is transferred uniformly and minimizes misprints. Dirty apertures cause the release of the paste to be uneven and cause defects, leading to increased rework rates. Good cleaning helps to improve the consistency of SMT print output and yields.
What Is SMT Stencil Cleaning?
SMT stencil cleaning removes solder paste residue from aperture walls and stencil surfaces. A stencil cleaning process operates through two distinct stages, under-screen cleaning and off-line cleaning. Under-screen cleaning occurs during production cycles. Off-line cleaning occurs after production completion.
Under-screen cleaning maintains aperture openness between print cycles. Off-line cleaning restores full stencil geometry after extended use. SMT cleaning system chemistry dissolves flux compounds without damaging stencil tension. Solder paste stencil materials retain structural stability under controlled solvent exposure.
Solvent selection controls residue breakdown efficiency. IPA and dedicated flux removers dissolve paste binders without deforming aperture edges. Mechanical wiping combines with solvent action for surface restoration. Controlled pressure prevents stencil distortion and aperture widening.
In real SMT lines, this becomes visible when operators notice paste starting to "smear" instead of releasing cleanly after multiple prints. Fine-pitch boards are usually the first to show this issue, especially around QFN and BGA areas.
Common Problems Caused by Clogged Stencil Apertures
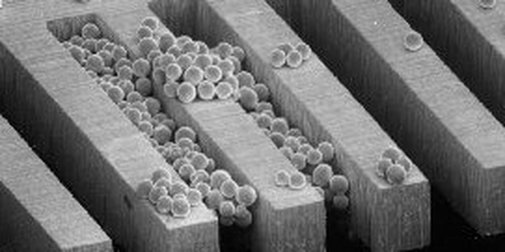
The defects caused by aperture blockage can be measured throughout the SMT assembly process. Due to residue accumulation, the solder paste flow is reduced through the stencil openings. Decreased transfer efficiency alters the size of the deposits and compromises pad coverage uniformity. The following defects are caused by clogged stencil apertures when SMT stencil cleaning is neglected.
- Solder Bridging: Stencil residue on the underside of the stencil spreads on neighboring pads. When printing, too much solder joins adjacent pads. During reflow, these deposits become electric shorts in signal lines.
- Insufficient Solder Deposition: Partial aperture blockage restricts solder paste volume transfer. Dried paste limits material flow through stencil openings. Reduced deposition weakens solder joints and lowers mechanical reliability.
- Solder Ball Formation: Residual solder paste transfers to unintended PCB areas due to clogged stencil apertures or poor cleaning. During reflow, these misplaced deposits melt and separate under surface tension, solidifying into solder balls around pads and traces.
- Inconsistent Paste Geometry: Clogged stencil apertures distort paste shape across pad arrays. Uneven deposition alters joint height and contact area. Variability across pads increases alignment defects during component placement.
In production, these issues are often first detected during inspection when paste volume starts to vary among identical boards in the same batch, even though printing parameters have not changed.
These defects can be completely removed at the source by following a consistent SMT stencil cleaning process. Clean apertures result in consistent transfer of paste and geometry of deposition. With controlled residue removal, print consistency improves in each PCB production cycle.
The Physics of SMT Stencil Cleaning: Transfer Efficiency
Paste transfer efficiency is the measure of the performance of SMT printing. The transfer efficiency stability is directly controlled by the SMT stencil cleaning process. The transfer efficiency is defined as:
TE = Vdeposited / Vaperture
Clean stencil surfaces have TE values ranging from 80% to 100%. Defective apertures lead to loss of volumetric transfer, and the geometry of the solder is altered. As residue builds up on aperture walls, TE drops — first inconsistently, then predictably below 70%, at which point defect rates rise sharply.
This is usually observed at the mid-run inspection and occurs when the same aperture is printing more or less paste after multiple prints when the stencil pressure and speed settings are not changed.
An even stencil cleaning process ensures even paste release and mechanics. Because of less friction, the separation between the stencil and the surface of the PCB is better. With uniform release, the geometry of each deposit is consistent across the pad array, which lowers variation in the joints during reflow.
How to Clean Solder Paste Stencils: Manual vs Automated

Controlled removal of the solder paste from the stencil surfaces is key to consistent solder paste deposition. The SMT stencil cleaning process controls the contamination in the aperture and in the underside surface of the stencil. Selection between manual and automated methods is based on production volume, pitch requirements, and process consistency targets.
1Manual Cleaning Approach
Manual clean-up is used in low-volume production or prototype applications. IPA cleans flux residues and removes the solder paste binders on the surface of the stencil. Lint-free wipes remove residue without leaving fiber deposits inside aperture walls.
This is often observed when a stencil is cleaned too rigorously with wipes, and then the operator detects a traceability problem of the fine-pitch ICs caused by the small aperture edge disturbance of the wipe. Manual cleaning performance is dependent on the consistency of the operator and the control of the distribution of the solvent. Streaking occurs in aperture arrays and has an impact on the uniformity of paste deposition across the board in later cycles.
2Automated Cleaning Systems
The automated SMT cleaning system is used in high-volume production with controlled repeatability. The cavitation energy from the ultrasonic systems can be used to dissolve all types of residue in micro-geometry apertures. Spray systems provide even application of solvent to large stencil surface areas. Automated SMT cleaning systems reduce operator dependence and improve process repeatability.
In fine aperture structures, deep contamination is removed by ultrasonic cleaning. Automated cleaning is usually performed after a predetermined number of prints in high-volume SMT lines, particularly if operators notice a drift in paste volume at AOI.
Stencil Cleaning Frequency: How Often Is Enough?

The frequency of stencil cleaning is based on the type of solders used, board density, and aperture geometry. In normal production, the standard SMT stencil cleaning is carried out after each 5–10 prints. The narrow layout, lower aperture tolerances, and increased sensitivity to paste increase the required frequency of cleaning in fine-pitch layouts. Residue build-up is greater with high-density PCB layouts over multiple print cycles.
The typical stencil can tolerate moderate residue buildup before transfer decreases. With a fine pitch of 0.4 mm, the design requires a closer interval between cleaning because smaller apertures are highly susceptible to clogging, which immediately leads to critical "insufficient solder" defects. Nano-coated stencils increase the number of print cycles beyond 20 without the need to clean.
All types of stencils are harder to clean when they are dry. Hardened paste bonds to aperture walls and decreases the efficiency of solvent penetration. The longer it takes to clean, the more solvent will be needed later, and the greater mechanical force will be required to remove the residues.
In reality, if the cycle count threshold has not been met but there is a production delay (such as lunch breaks or machine downtime), it is necessary to clean the machine right away before production resumes. The partially dried paste will act as a blockage.
Best Practices for a Reliable Stencil Cleaning Process
Periodic stable SMT output requires a disciplined cleaning execution in production cycles. Variation in residue causes changes in the transfer consistency of solder paste between boards. Controlled chemical exposure and mechanical handling are factors that determine aperture geometry retention. With poor process control, one cannot ensure repeatability, and defect rates will increase.
Solvent compatibility, wipe quality, and drying verification are all aspects of process control. The efficiency of removal varies from one stencil surface to another as a result of the chemical interaction between flux residue and solvent. Repeated cleaning cycles can distort fine aperture geometry when incompatible solvents degrade adhesive interfaces.
Core Process Controls
- Ensure solvents are compatible with the stencil adhesive systems to avoid structural degradation.
- Choose lint-free cleaning products that will not leave fiber deposits on aperture walls.
- Ensure everything has dried thoroughly before starting the next print cycle to ensure paste performance.
Repeatedly run PCBs with consistent solder paste transfer using each control step.
Drying and Residue Control
Residual solvent alters solder paste rheology during deposition cycles. Incomplete drying reduces paste cohesion and shifts stencil release dynamics at the pad level. Controlled drying maintains uniform deposit volume across apertures and reduces variation across fine-pitch layouts.
Why JLCPCB Stencils Offer Superior Cleaning Durability
Ultrasonic-Resistant Adhesive Frame
JLCPCB stencil systems maintain structural stability under repeated SMT stencil cleaning cycles. Ultrasonic-resistant adhesive prevents frame separation during aggressive cleaning. Adhesive structure maintains mechanical integrity across multiple cleaning operations.
Nano-Coated Aperture Walls
Nano-coating reduces paste adhesion on aperture walls. Flux resistance lowers cleaning frequency and improves release consistency. Reduced surface energy improves SMT stencil cleaning efficiency, enabling cleaning intervals beyond 20 print cycles.
Electropolished Aperture Geometry
Electropolished aperture walls reduce residue retention. Smooth geometry minimizes paste trapping inside micro openings. Consistent wall finish improves transfer efficiency across repeated cycles and extends stencil service life.
JLCPCB stencils start at low-cost production tiers with rapid turnaround. The 12-hour fabrication cycle supports fast prototype iteration. Global shipping covers production requirements across multiple regions.
Choose from Framed/Frameless, Electropolishing, Nano-coating, Step-Stencils, SMD Glue Stencil and more. Starting at $3. No MOQ. 12-Hour production.
Get $11 Coupon Now >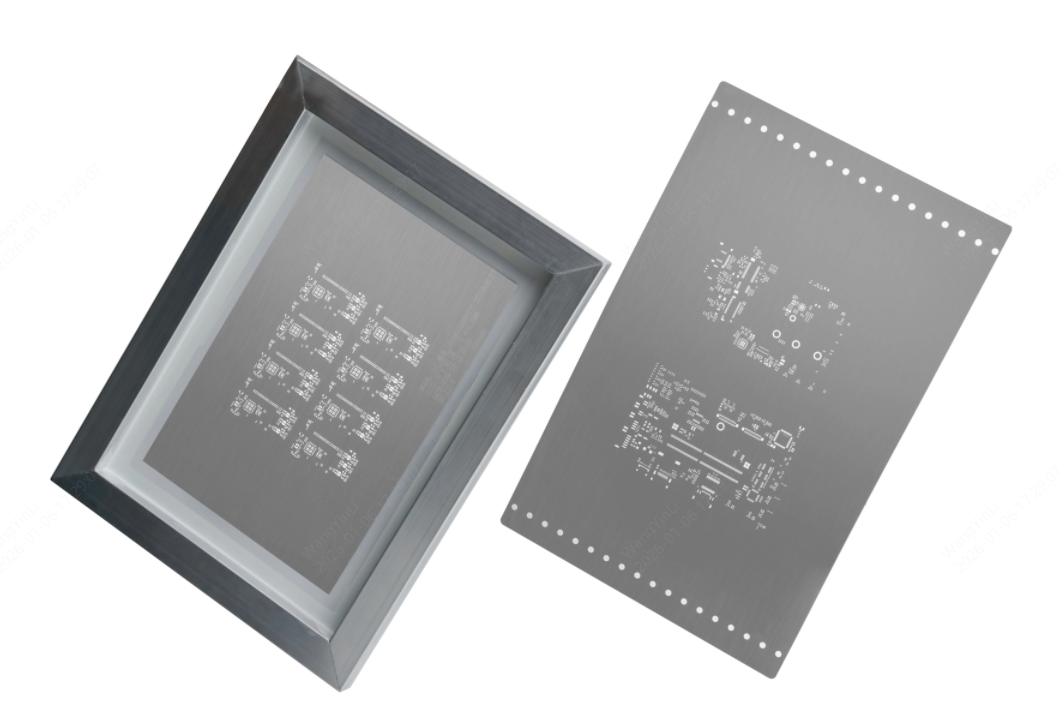
Frequently Asked Questions (FAQs) about SMT Stencil Cleaning
What happens if I don't clean my stencil between print cycles?
Solder paste residue hardens on aperture walls progressively, blocking paste flow over successive cycles. By the third or fourth unclean print, you'll see insufficient solder on inner pads, especially fine-pitch BGAs. Defect rates typically increase 15–20% by cycle ten, making recovery harder as dried flux becomes mechanically bonded to steel.
What are the consequences of leaving solvent residue on the stencil before printing?
Residual solvent film on apertures prevents paste transfer, causing drastically reduced volume or patchy deposition on initial boards. The first three to five prints show unreliable solder joints or completely missing deposits. Allow five to ten minutes air-drying after cleaning, or use compressed air carefully to accelerate evaporation before production resumes.
Why does my IPA-cleaned stencil still cause bridging on subsequent prints?
IPA removes fresh paste but cannot fully dissolve heavily oxidized paste or hardened rosin flux in crevices. Residue remaining in aperture walls acts as particles dragged through fresh paste, creating bridges or uneven thickness. Upgrade to specialized SMT cleaners or use ultrasonic assistance to dislodge stubborn residue effectively.
How do I know when my stencil needs cleaning versus replacement?
Clean when you see bridging or insufficient solder that improves after thorough cleaning. Replace when you observe visible pitting, frame delamination, permanent distortion, or paste that won't release despite cleaning. Most stencils last 500–1000+ production cycles; prototype work rarely needs cleaning, while high-volume runs need weekly maintenance.
Is there a way to reduce cleaning frequency without sacrificing print quality?
Paste chemistry significantly impacts oxidation rates; premium formulations stay viable six to eight hours versus two to three hours for standard paste. Humidity control at 45–55% RH versus 60%+ extends cleaning intervals by 20–30%. Storing solder paste sealed and cool between prints reduces oxide buildup considerably.
Conclusion: Making SMT Stencil Cleaning the Foundation of Print Quality
SMT stencil cleaning is one of the highest-leverage process controls in the entire SMT line. Cleaning frequency, solvent choice, and method (manual versus automated) each affect paste transfer efficiency directly — and with over 60% of SMT defects originating at the print stage, getting cleaning right is rarely optional. A consistent cleaning routine, paired with the right solvent and lint-free wipes, keeps transfer efficiency steady across long production runs and prevents the four recurring defects — bridging, insufficient deposits, solder balls, and inconsistent paste geometry — from showing up at AOI.
Sustained print quality, however, comes from a combination of disciplined cleaning intervals and stencil hardware built to tolerate them. Stencils with nano-coated apertures, electropolished walls, and ultrasonic-resistant adhesive — the kind JLCPCB ships at MOQ 1, from $3, with a 12-hour build time — hold up across the kind of cleaning cycles where standard stencils degrade. Pair the right stencil with the right cleaning routine, and the print step stops being where defects originate.
Keep Learning
SMT Stencil Storage & Life: How to Store Stencils and Extend Their Lifespan
Key Takeaways Store it clean and dry: Remove all paste and flux, then dry both faces and the apertures completely before a stencil goes back on the shelf. Support it, never stack it loose: Keep a stencil flat with full support or upright in a rack, in a clean, dry, stable-temperature area away from dust and sunlight. Stencils do not expire like paste: Life is set by cleanliness, handling, moisture, material, coatings, and frame or mesh condition, not by a shelf-life date. Replace when geometry changes......
Stencil Cleaning Methods: Manual vs Automatic
For precise and reliable solder paste pattern application on the PCB pads in Surface Mount Technology (SMT) printed circuit board assembly, stencils are utilized. To keep the print quality high and avoid mistakes, it's important to clean the cutouts often. Although automatic stencil cleaners are frequently used in manufacturing, hand cleaning is recommended when assembling prototype PCBs or in smaller quantities. Because it determines the process's yield and return on investment, stencil cleaning is a......
SMT Stencil Cleaning Guide: Process, Frequency, and Tips
Key Takeaways about SMT Stencil Cleaning SMT stencil cleaning removes solder paste residue from aperture walls and the stencil underside, keeping paste transfer efficiency between 80% and 100%. Industry analysis attributes over 60% of SMT defects to the paste-print step — most of which trace back to a stencil cleaning lapse. Two stages matter: under-screen cleaning (between cycles, typically every 5–10 prints) and off-line cleaning (after production completes). IPA handles standard flux residue; dedic......