
How to Choose Temperature Control for Custom Flexible Heating Films
13 min
- Understanding the Basics: What is a Thermal Control Switch?
- Temperature Control Switch vs. NTC Thermistor: Which One Do You Need?
- Selection Strategy: Matching Components to Your Design Goals
- Quick Decision Flowchart
- Key Technical Considerations for Custom Heating Films
- Common Design Mistakes (And How to Avoid Them)
- Testing and Validation Checklist
- Advanced: Hybrid Control Configurations
- Cost Analysis: Making the Business Case
- Troubleshooting Guide
- Conclusion: Elevating Safety in Flexible Heating Solutions
So, you're designing a custom heating solution—perhaps a heated jacket, a 3D printer bed, or a specialized medical device. You've picked out your heating film material, but now you face a critical question: How do I stop this thing from getting too hot?
Selecting the right temperature control is just as important as the heating element itself. It's the difference between a cozy, efficient device and a melted, hazardous mess. But with terms like "NTC," "Bi-metal," and "Hysteresis" thrown around, it can get confusing.
In this guide, backed by insights from the engineering team at JLCPCB, we'll break down exactly how to choose the right control logic for your flexible heating films.
Understanding the Basics: What is a Thermal Control Switch?
At its simplest, a Thermal Control Switch (often called a thermostat or thermal protector) is the "reflex system" of your heater. It doesn't "think"; it just reacts.
The core magic happens inside a component called the bi-metal strip. This is a small piece of metal composed of two different alloys laminated together. Because these two metals expand at different rates when heated, the strip physically bends or deforms as the temperature rises.
When the heat hits a specific threshold, that physical bending creates a mechanical action—snap!—that breaks the electrical circuit.
The Three Pillars of a Thermal Switch
To choose the right one, you need to understand its three main personality traits:
1. Contact Status (Normally Closed vs. Normally Open):
For heaters, we almost always use Normally Closed (NC). This means electricity flows freely (and the heater heats) when the device is at room temperature. When it gets too hot, the switch opens (disconnects) to stop the power.
Normally Open (NO) is rarely used for heating; it's mostly for cooling fans that need to turn on when things get hot.
2. Action Temperature:
This is your safety limit. If you choose an 80°C action temperature, the bi-metal strip will deform enough to snap the circuit open the moment the heater hits 80°C, cutting the power immediately.
3. Reset Temperature:
Once the power is cut, the heater cools down. The Reset Temperature is the point where the metal strip relaxes back to its original shape, closing the circuit and letting the heater run again. For example, it might cut off at 80°C and kick back on at 60°C.
Temperature Control Switch vs. NTC Thermistor: Which One Do You Need?
When customizing a heating film, you generally have two main choices for temperature management: the Thermal Switch and the NTC Thermistor. Think of them as the difference between a "Bodyguard" and a "Brain."
The "Brain": NTC Thermistor
NTC stands for Negative Temperature Coefficient. It is a semiconductor resistor.
How it works: As it gets hotter, its electrical resistance drops continuously. It doesn't simply say "On" or "Off." It says, "Right now it is 40.5°C... now it is 40.6°C..."
Pros: High precision and fast response. It allows for real-time monitoring and can detect temperature changes within 0.1°C in some cases.
The Catch: It's passive. An NTC cannot stop the current by itself. It sends data to an external controller (like a microcontroller or PID thermostat) which then decides what to do.
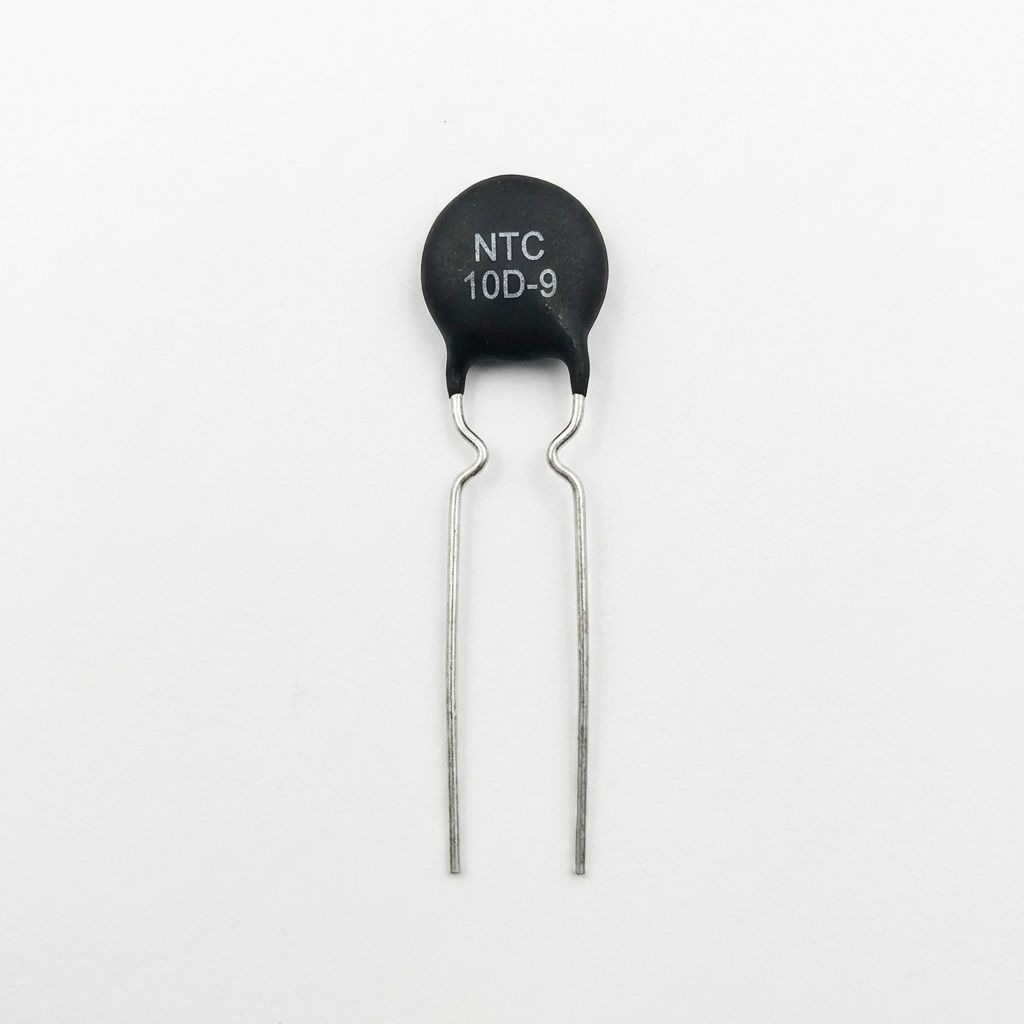
NTC Component
The "Guard": Thermal Switch
How it works: It uses physical deformation (bi-metal, wax, or shape memory alloy) to physically break the circuit.
Pros: Simple, reliable, and independent. It needs no software, no coding, and no external computer chips to work. Perfect for fail-safe protection.
The Catch: Lower precision. It acts in a range (hysteresis) rather than holding a specific degree perfectly.
| Feature | NTC Thermistor | Thermal Switch |
| Role | Sensor (The Brain) | Protector (The Guard) |
| Output | Continuous analog signal | Simple On/Off |
| Complexity | High (Needs external circuit) | Low (Plug & Play) |
| Precision | Very High (±0.1-1°C) | Moderate (±5-10°C) |
| Response Time | Fast (1-5 seconds) | Moderate (5-15 seconds) |
| Cost | $0.10-$2.00 | $0.50-$5.00 |
| Lifespan | 100,000+ hours | 10,000-100,000 cycles |
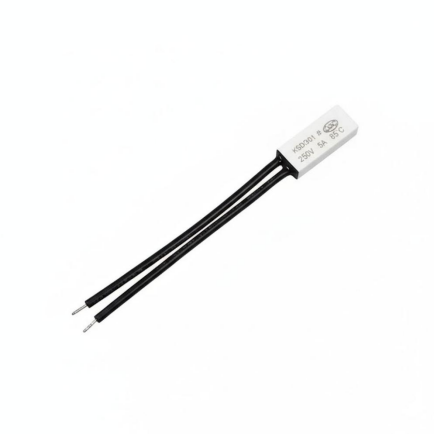
Thermal Switch
Selection Strategy: Matching Components to Your Design Goals
So, which one belongs on your flexible heater?
Scenario A: Precision Control (Choose NTC)
If you are building a medical incubator or a precision chemical heater where the temperature must stay exactly at 37.5°C, you need an NTC. You will feed the NTC's signal into a PID controller to constantly pulse the power, keeping the temperature perfectly stable.
Example Applications:
● Medical warming blankets (must maintain 37°C ±0.5°C)
● Laboratory equipment
● 3D printer beds requiring precise adhesion temperatures
● Semiconductor manufacturing tools
Scenario B: Simple Safety (Choose Thermal Switch)
If you are designing a coffee mug warmer or a seat heater, you might not need a computer chip. You just need the heater to stay roughly warm and ensuring it never catches fire. A simple thermal switch that cycles on and off is cost-effective and robust.
Example Applications:
● Hand warmers
● Pet heating pads
● Simple food warmers
● Automotive seat heaters (basic models)
Scenario C: The "Golden Standard" (Choose Both)
For high-quality electronics, engineers often recommend a hybrid approach.
● Use an NTC to regulate the temperature day-to-day (precise control).
● Add a Thermal Switch in series as a fail-safe. If the software crashes or the NTC fails, the Thermal Switch acts as the "hard stop" to prevent overheating.
Example Applications:
● Premium heated clothing
● Medical devices (FDA/CE regulated)
● Consumer electronics with heating elements
● Battery heating systems for EVs
Quick Decision Flowchart
Start here: What is your primary goal?
1. Need exact temperature (±1°C)? → NTC + Controller
2. Just need "warm enough" and safe? → Thermal Switch only
3. Commercial product with liability concerns? → Both (NTC + Thermal Switch)
4. Battery powered and need efficiency? → NTC + PWM Controller
5. Extremely low cost requirement (<$1 total)? → Thermal Switch only
Key Technical Considerations for Custom Heating Films
When you are ready to order your heating film, keep these engineering details in mind:
1. Rated Current and Voltage
A switch is a physical gate. If you try to push too much power through a small switch, the internal contacts can weld together (getting stuck in the "On" position), which is dangerous.
Practical Guidelines:
● For 5V USB heaters (typical: 2-3A) → Use switches rated for at least 5A at 125VAC
● For 12V automotive (typical: 5-10A) → Use switches rated for at least 15A at 250VAC
● For AC mains heating (120V/240V) → Ensure UL/CE rated switches with proper safety margins
Pro Tip: Always derate by 20-30%. If your heater draws 3A, use a switch rated for at least 4-5A to ensure longevity.
2. Hysteresis (The Temperature Gap)
The difference between the Action Temperature (Off) and Reset Temperature (On) is called hysteresis.
If the gap is too small: The heater will flick on and off rapidly (short-cycling), wearing out the switch and creating an annoying clicking sound.
If the gap is too wide: The device might get too cold before it starts heating again, creating an uncomfortable experience.
Most standard switches have a healthy gap (e.g., Off at 80°C, On at 60°C) to ensure stable operation.
Optimal Hysteresis by Application:
● Comfort heating (clothing, seats): 10-15°C gap
● Process heating (manufacturing): 5-10°C gap
● Safety cutoff (fire prevention): 20-30°C gap
3. Mounting and Thermal Lag
Whether using an NTC or a Switch, location is everything. The sensor must be in good thermal contact with the heat source. In flexible films (like Polyimide or PET heaters), manufacturers usually mount the sensor directly over the heating traces using specialized adhesives or soldering.
Tip: If the sensor is placed too far from the heating element, there will be "Thermal Lag." The heater might actually be 100°C while the sensor only reads 60°C, causing a delay in protection.
Best Mounting Practices:
● Direct contact: Place sensor directly on heating traces with thermal epoxy
● Kapton tape: Use for temporary prototypes, but not production
● Thermal interface material: Apply thin layer of thermal paste or pad
● Avoid air gaps: Even 0.5mm of air creates significant lag
Thermal Lag Examples:
● Sensor on heating trace: <2 seconds response time
● Sensor 5mm away with air gap: 15-30 seconds lag (dangerous!)
● Sensor on opposite side of PCB: 10-20 seconds lag
4. Material Compatibility
Your heating film substrate matters:
| Substrate | Max Temperature | Best Control Method | Notes |
| Polyimide (Kapton) | 200-300°C | NTC + High-temp switch | Most versatile, expensive |
| PET | 80-120°C | Standard thermal switch | Cost-effective for low temps |
| Silicone Rubber | 150-200°C | Either method | Flexible, good for wearables |
| PTC Fabric | Self-regulating | None needed (built-in) | Expensive, limited power |
5. Regulatory and Safety Standards
Don't overlook compliance—it can make or break your product launch.
Key Standards to Consider:
● UL 499 (Electric Heating Appliances - USA)
● IEC 60335 (Household appliances - International)
● CE Marking (European Union)
● FDA 21 CFR Part 820 (Medical devices - USA)
● UL 2738 (Low voltage battery powered equipment)
What regulators look for:
● Independent thermal cutoff (can't be disabled by software)
● Dual protection (primary control + backup safety)
● Flame-retardant materials
● Proper wire gauge and insulation ratings
● Clear labeling of maximum temperatures
Common Design Mistakes (And How to Avoid Them)
Mistake #1: Choosing Action Temperature Too Close to Operating Temperature
Wrong: Operating at 70°C, action temperature at 75°C Why it fails: Normal temperature variations will trigger constant cycling Right approach: Add 15-20°C safety margin (action at 90°C for 70°C operation)
Mistake #2: Using Consumer-Grade Components for Industrial Applications
Wrong: $0.50 thermal switch from generic supplier for 24/7 operation Why it fails: Rated for only 10,000 cycles, will fail in months Right approach: Specify industrial-grade components rated for your duty cycle
Mistake #3: Ignoring Thermal Runaway Scenarios
Wrong: Single NTC control with no backup Why it fails: If NTC shorts or controller freezes, heater stays on indefinitely Right approach: Always add a mechanical thermal fuse or switch as last-resort protection
Mistake #4: Poor Sensor Placement
Wrong: Mounting sensor on the edge or backside of heating film Why it fails: Temperature reads 20-30°C lower than actual hotspot Right approach: Place sensor at the geometric center or hottest expected point
Mistake #5: Undersizing Wire Gauge
Wrong: Using 26AWG wire for a 5A heater Why it fails: Wire heats up, melts insulation, creates fire hazard Right approach: Follow NEC/IEC wire sizing charts with 125% safety factor
Testing and Validation Checklist
Before finalizing your design, run these tests:
Basic Functional Tests
● [ ] Verify action temperature triggers within ±5°C of spec
● [ ] Confirm reset temperature behaves as expected
● [ ] Test at minimum and maximum rated voltages
● [ ] Verify current draw matches calculations
Safety Tests
● [ ] Blocked ventilation test (cover heater, ensure cutoff works)
● [ ] Sensor failure test (disconnect NTC, verify backup activates)
● [ ] Overvoltage test (apply 110% rated voltage)
● [ ] Thermal cycling (500+ on/off cycles to verify switch life)
Environmental Tests
● [ ] Humidity exposure (if applicable)
● [ ] Vibration testing (for mobile applications)
● [ ] Temperature shock (rapid hot/cold transitions)
Compliance Tests
● [ ] Flammability testing (UL94 rating)
● [ ] EMC/EMI testing (for electronics with controllers)
● [ ] Insulation resistance testing
● [ ] Ground continuity testing (if applicable)
Advanced: Hybrid Control Configurations
For sophisticated applications, consider these advanced architectures:
Configuration 1: PID Control + Dual Backup
Setup:
● Primary: NTC → PID controller → SSR (Solid State Relay)
● Backup 1: Secondary NTC → Hardware comparator → Relay cutoff
● Backup 2: Mechanical thermal fuse (one-time, non-resettable)
Use case: Medical devices, aerospace, critical applications
Configuration 2: Microcontroller with Watchdog
Setup:
● NTC → Microcontroller with PID algorithm
● Watchdog timer resets system if software hangs
● Thermal switch in series as hardware failsafe
Use case: Smart heated clothing, IoT devices
Configuration 3: Distributed Sensing
Setup:
● Multiple NTCs across large heating area
● Controller monitors all sensors
● Shuts down if ANY sensor exceeds threshold
Use case: Large heated beds (3D printers), industrial heating mats
Cost Analysis: Making the Business Case
Understanding the cost implications helps you make informed decisions:
Budget Breakdown (for 1000 units)
Option A: Thermal Switch Only
● Component cost: $0.50-$2.00 per unit
● No controller needed: $0
● Assembly: Simple, low labor cost
● Total: $0.50-$2.00 per unit
● Best for: Consumer products, price-sensitive markets
Option B: NTC + Controller
● NTC: $0.20-$0.50
● Microcontroller: $0.50-$2.00
● Supporting components (resistors, capacitors): $0.10
● PCB space and assembly: $0.50-$1.00
● Total: $1.30-$3.60 per unit
● Best for: Premium products, precise control needs
Option C: Hybrid (NTC + Controller + Thermal Switch)
● Combination of above
● Total: $2.00-$5.00 per unit
● Best for: Safety-critical applications, regulated industries
Troubleshooting Guide
Problem: Heater cycles on and off too frequently
Possible causes:
● Hysteresis gap too small
● Sensor too close to heating element
● Controller gain settings too aggressive (for PID)
Solutions:
● Choose switch with wider hysteresis (15-20°C)
● Add thermal insulation between sensor and heating traces
● Reduce PID proportional gain, increase integral time
Problem: Heater doesn't reach target temperature
Possible causes:
● Action temperature set too low
● Insufficient power (undersized heater)
● Excessive heat loss (poor insulation)
● Thermal switch failed in open position
Solutions:
● Verify action temperature is 15-20°C above target
● Calculate heat loss and resize heater accordingly
● Test switch continuity with multimeter
Problem: Heater gets too hot before shutting off
Possible causes:
● Thermal lag between sensor and heater
● Sensor mounted incorrectly
● Wrong action temperature specified
Solutions:
● Improve thermal contact (use thermal epoxy)
● Relocate sensor to hottest point
● Choose lower action temperature switch
Problem: Inconsistent temperature control
Possible causes:
● Ambient temperature variations
● Voltage fluctuations
● Aging thermal switch (contact degradation)
Solutions:
● Add ambient temperature compensation (second NTC)
● Use regulated power supply
● Replace thermal switch (they wear out after 10K-100K cycles)
Conclusion: Elevating Safety in Flexible Heating Solutions
Designing a heating element is a balancing act between delivering heat efficiently and controlling it safely. While NTCs offer the precision required for modern smart devices, the humble thermal switch remains the backbone of safety, providing a physical guarantee against overheating.
Whether you are building a prototype or a mass-market product, remember that temperature control is not an afterthought—it is the heart of your device's reliability.
Final Recommendations
For Hobbyists and Prototypes: Start simple with a thermal switch. Learn the basics before adding complexity.
For Commercial Products: Invest in the hybrid approach (NTC + thermal switch). The extra cost is insurance against liability and returns.
For Safety-Critical Applications: Don't compromise. Use redundant systems, get professional certification testing, and work with experienced manufacturers.
For Innovation: Consider emerging technologies like PTC materials or smart controls, but always maintain a hardware failsafe.
Keep Learning
Flexible Heater Design Optimization: Why We Use Rounded Corners and Teardrops
TL;DR: Those sleek curves and "teardrops" you see on flexible heater circuits aren't just for looks. They are critical engineering features that: Prevent Cracking: Rounded corners distribute physical stress during thermal expansion, stopping metal fatigue and micro-cracks. Even Out Heat: Smooth paths prevent electrical "hotspots" that occur at sharp 90-degree angles. Boost Durability: Teardrops act like mechanical tendons, strengthening fragile solder connections against pulling and bending. Improve M......
How to Choose Temperature Control for Custom Flexible Heating Films
So, you're designing a custom heating solution—perhaps a heated jacket, a 3D printer bed, or a specialized medical device. You've picked out your heating film material, but now you face a critical question: How do I stop this thing from getting too hot? Selecting the right temperature control is just as important as the heating element itself. It's the difference between a cozy, efficient device and a melted, hazardous mess. But with terms like "NTC," "Bi-metal," and "Hysteresis" thrown around, it can......
Custom Flexible Heater Case Study: From JLC PCB Order to Performance Validation
Introduction Flexible heaters represent a paradigm shift in modern heating technology, redefining our approach to thermal management in electronic systems. The evolution from traditional rigid resistive heating elements to PCB-based flexible heating solutions marks a significant leap toward high-precision, high-reliability manufacturing. This comprehensive guide explores the technical principles, material engineering, design methodologies, and practical applications of flexible heaters, providing engi......
Flexible Heater Design Tutorial with JLCPCB Calculator Tool
This tutorial is specifically designed for JLCPCB's flex heater customization service. We provide a dedicated calculator tool that simplifies the complex trace design process, allowing you to focus on performance parameters while our engineers handle the technical implementation. Click here to download the Excel file! Introduction In this article, I'll explain how to design a flex heater from the perspectives of material selection and electrical design. I believe every electronics DIY enthusiast is so......
3D Printer Bed Heating Upgrade: How to Replace Your Silicone Heater
In the world of 3D printing, the extruder often gets all the glory, but seasoned makers know the truth: a successful print starts with the first layer. Friends living in colder climates might recognize this scene: it’s winter in the garage, the room temperature has plummeted, and you are shivering next to your printer, waiting endlessly for the bed to heat up. Or perhaps your "old reliable" machine, which has clocked hundreds of printing hours, is starting to show signs of uneven heating. Just like ca......
Factors Affecting Heating Film Uniformity: A Guide for Efficient Thermal Management
Resistive heating elements, particularly in thin, flexible forms known as heating films, have become the backbone of modern efficient thermal management. Their ability to deliver controllable, uniform heat within compact devices makes them indispensable in industries ranging from aerospace to medical tech. However, simply applying power to a resistive circuit does not guarantee performance. Achieving consistent temperature distribution in a flexible heater requires a deep understanding of circuit layo......