How To Export BOM and Pick & Place Files From Flux.ai [2026 Updated]
Last updated on Sep 10, 2026
Quick Overview
Exporting from Flux.ai to JLCPCB is easy once you know the one rule that matters: always use the files marked `JLCPCB`, and ignore everything else. Here's the quick recap:
- Export Gerber, BOM, and CPL from Flux.
- Ignore the BOM and `pick_and_place.csv` inside the Gerber ZIP.
- From the BOM and CPL ZIPs, keep only the `-JLCPCB.csv` files.
- Upload the Gerber first, enable PCB Assembly, pick the assembly side, then upload the BOM and CPL.
- Confirm the placement and place your order.
Follow those steps, and you'll avoid the "REF, DES" error and get a clean, ready-to-assemble order every time. If you get stuck at any point, our support team is here to help.
One of the most common questions from customers who design in Flux.ai is: "I exported my files, but which ones do I actually upload for assembly?" It's a fair question because Flux gives you a lot of files at once.
In this guide, you will know which BOM and CPL (Pick-and-Place) files to keep, which ones to ignore, and how to upload them, and you won't have any problems with your PCBA order.
What You'll Need Before You Start
This is an example board based on the ESP32 chip. As soon as the project is done and no DRC errors are detected, it's time to export the fabrication files.
For a proper PCB + assembly order, you need three files: Gerber, BOM, and the Pick-and-Place (CPL) files.
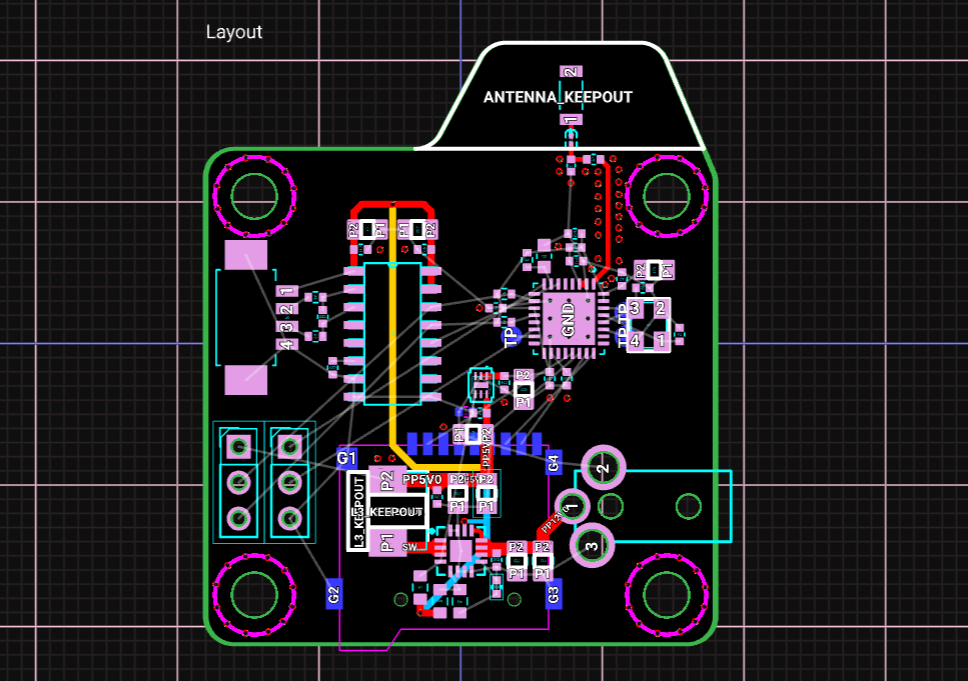
Figure 1. Example project for the Flux.ai
Step 1: Export Gerber, BOM, and CPL from Flux.ai
Open your project in Flux and head to the Export section.
Export all three file types: Gerber, BOM, and Pick-and-Place, just by clicking on these steps.
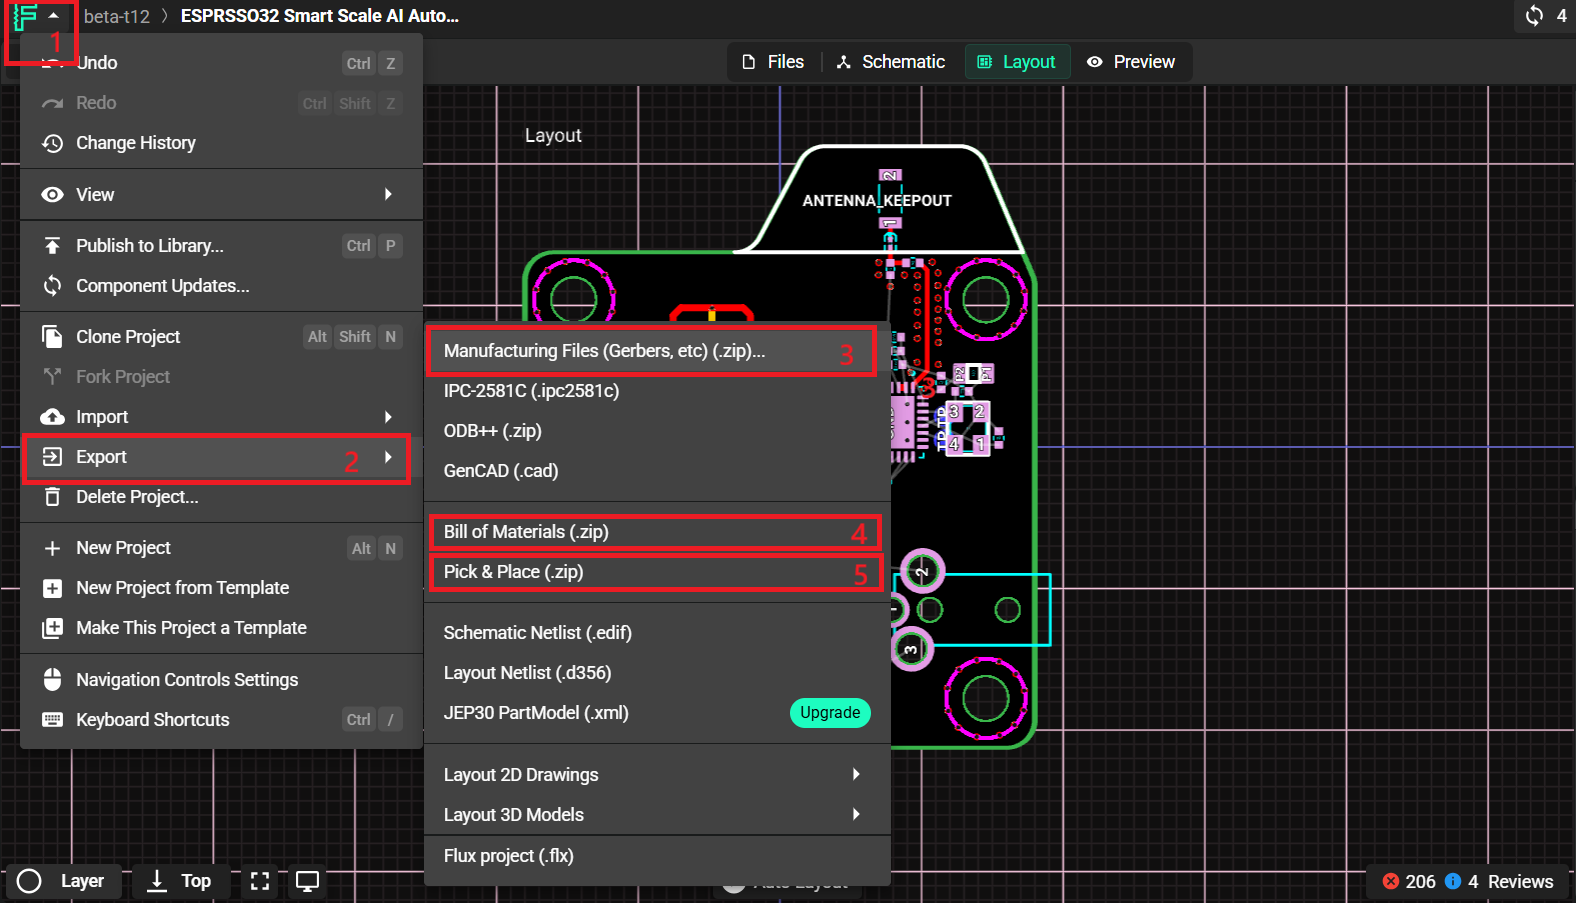
Figure 2. Exporting the fabrication files: Gerber, BOM, and CPL
Flux downloads them as separate ZIP files, so after the export, you'll see three items in your downloads: one for the Gerbers, one for the BOM, and one for the Pick-and-Place (CPL).
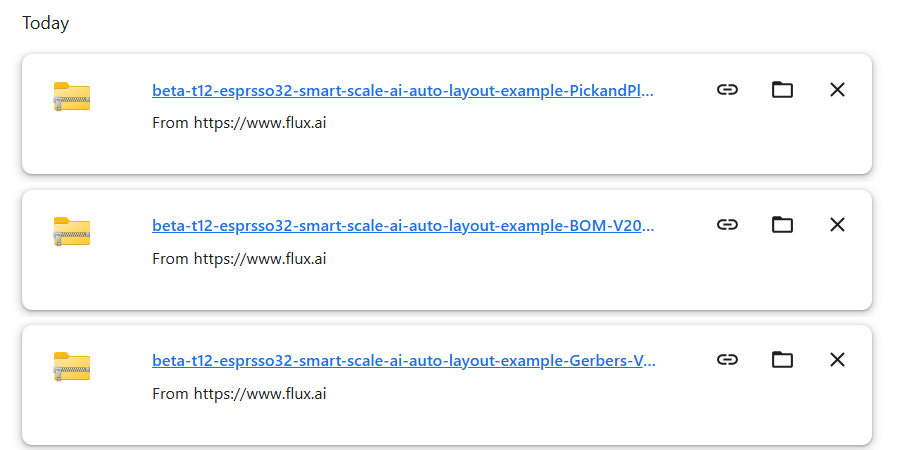
Figure 3. Downloaded files from flux
Keep all three for now. We'll sort out which files matter in the next steps.
Step 2: Don't Use the BOM and CPL Hidden Inside the Gerber ZIP
Here's the first trap. When you open the Gerber ZIP, you'll notice it already contains a BOM folder and a `pick_and_place.csv` file alongside the Gerber layers.
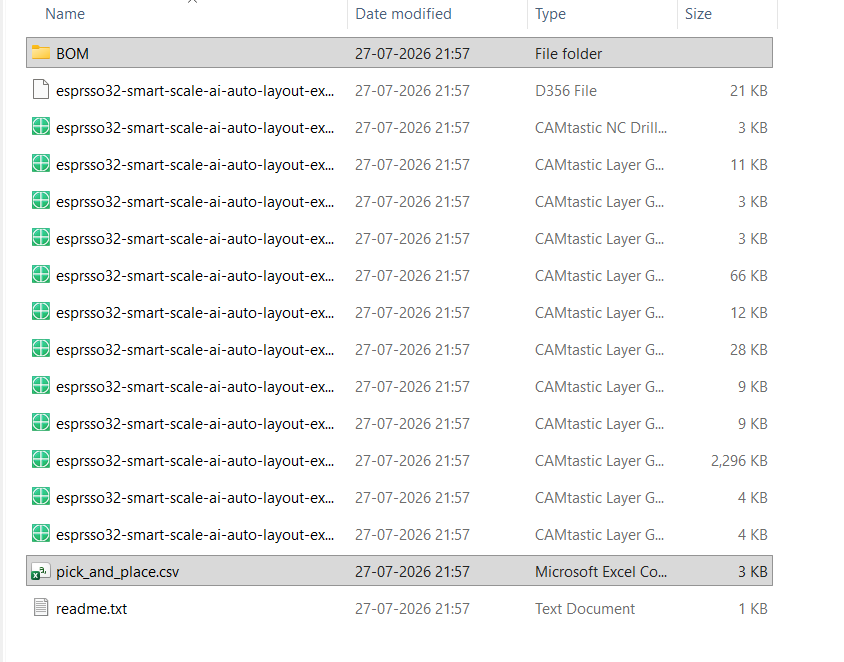
Figure 4. Exported GERBER folder contents
Note
Do not use these for your JLCPCB assembly order. They aren't formatted for the JLCPCB assembly system. We'll pull the correct BOM and CPL from the dedicated exports instead. The Gerber ZIP itself is still perfect; you'll upload that as-is for the PCB.
Step 3: Pick the Right BOM File - Marked as "JLCPCB"
Now open the BOM ZIP. Flux is generous here and generates a BOM for many manufacturers. You'll see files formatted for each PCB manufacturer.
You only need one of them: the file whose name ends with `JLCPCB.csv`.
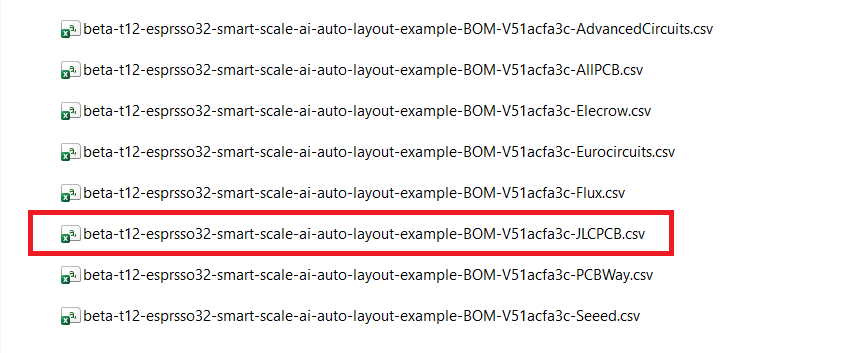
Figure 5. Exported BOM file contents
Copy that JLCPCB BOM file out. Ignore the rest, because they do not match our template.
Step 4: Pick the Right CPL (Pick-and-Place) File
Open the Pick-and-Place ZIP next. This one usually has two formats: a JLCPCB version and an OpenPNP version.

Figure 6. Exported CPL file contents
Again, grab only the file ending in `JLCPCB.csv`. That is your CPL (Component Placement List). The OpenPNP file is for a different machine workflow and won't work for our assembly line.
Step 5: Quick Check — Do the Columns Match the JLCPCB Template?
The Flux JLCPCB BOM is compatible with the regular JLCPCB BOM template with columns of Comment, Designator, Footprint, JLCPCB Part #, and LCSC Part #.
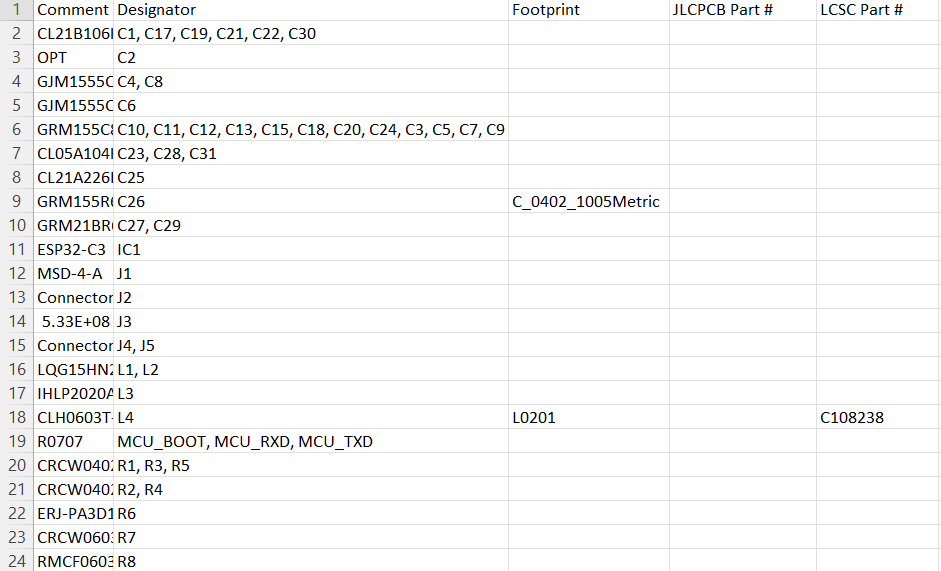
Figure 7. JLCPCB BOM file contents
And the JLCPCB CPL file has the placement columns we need: Designator, Mid X, Mid Y, Layer, Rotation, Package, and Value.
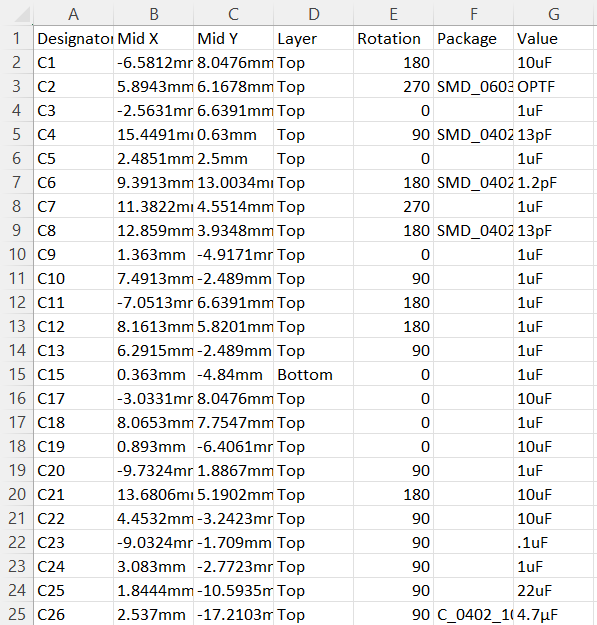
Figure 8. JLCPCB CPL file contents
If your two files look like this, you're good to go. JLCPCB accepts `.csv`, `.xls`, and `.xlsx` for the BOM and CPL. Flux exports them as `.csv`, which works perfectly.
Step 6: Clean Up Your Folder
To keep things simple and avoid uploading the wrong file by accident, I recommend copying just the three files you actually need into a fresh folder and renaming them clearly:
- `Gerber.zip`
- `BOM_JLCPCB.csv`
- `CPL_JLCPCB.csv`
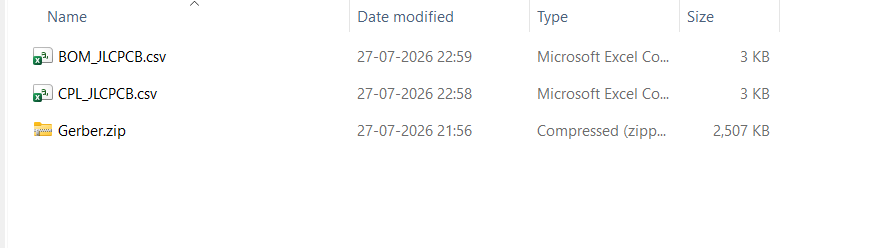
Figure 9. Saving all the files in one folder for later use
Now there's zero confusion about what to upload.
Step 7: Upload the Gerber to JLCPCB First
Head over to the JLCPCB ordering page and upload your `Gerber.zip` first. JLCPCB reads it, generates the board preview, and detects the specs automatically.
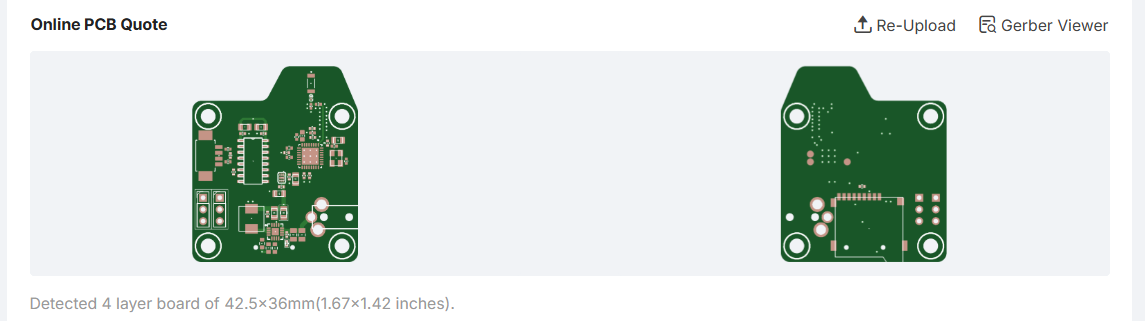
Figure 10. Uploading the GERBER file to JLCPCB
Take a moment to confirm that the detected size and layer count look right before moving on.
Step 8: Turn On PCB Assembly and Choose the Assembly Side
Scroll down and switch on PCB Assembly.
You'll be asked a few quick questions — PCBA type, quantity, and which side of the board to assemble.
For this board, all the parts are on top, so I selected Assemble top side and Top Side for the assembly side.
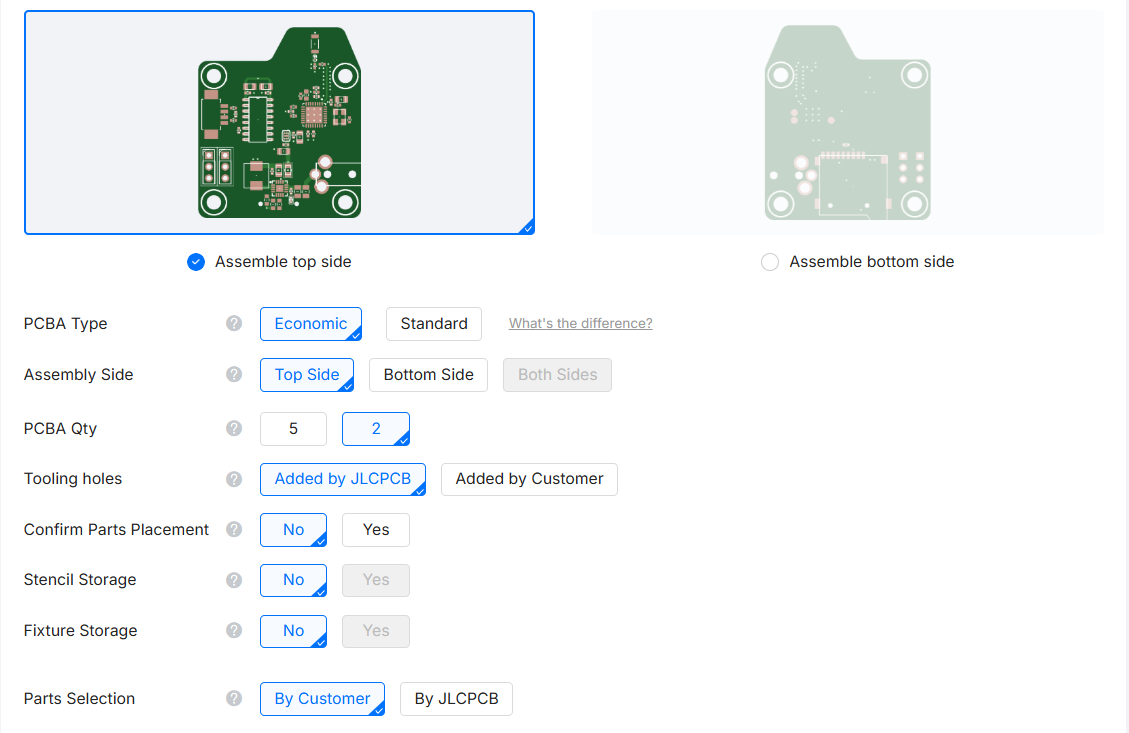
Figure 11. Opting for PCB Assembly order
Set the assembly side to match where your components actually sit. If you have parts on both sides, choose Both Sides instead.
Step 9: Upload the BOM and CPL (and the Error to Watch For)
Now upload your `BOM_JLCPCB.csv` and `CPL_JLCPCB.csv` in the BOM and CPL fields.

Figure 12. Uploading the BOM and CPL file to JLCPCB
This is exactly why we were so careful about picking the right files. If you accidentally upload a non-JLCPCB BOM or CPL (for example, the OpenPNP file or the copy buried in the Gerber ZIP), JLCPCB will flag it with an error like this:
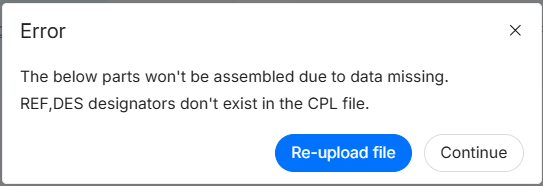
Figure 13. Error if wrong files are uploaded
That message — "REF, DES designators don't exist in the CPL file" almost always means the BOM and CPL don't match, which happens when you upload the wrong-format files. If you see it, go back and make sure both files are the `JLCPCB` ones.
When you upload the correct files, JLCPCB processes them and matches your parts. You may notice a few parts flagged as a shortfall (not enough stock); that's normal, and you can swap those for compatible alternatives.
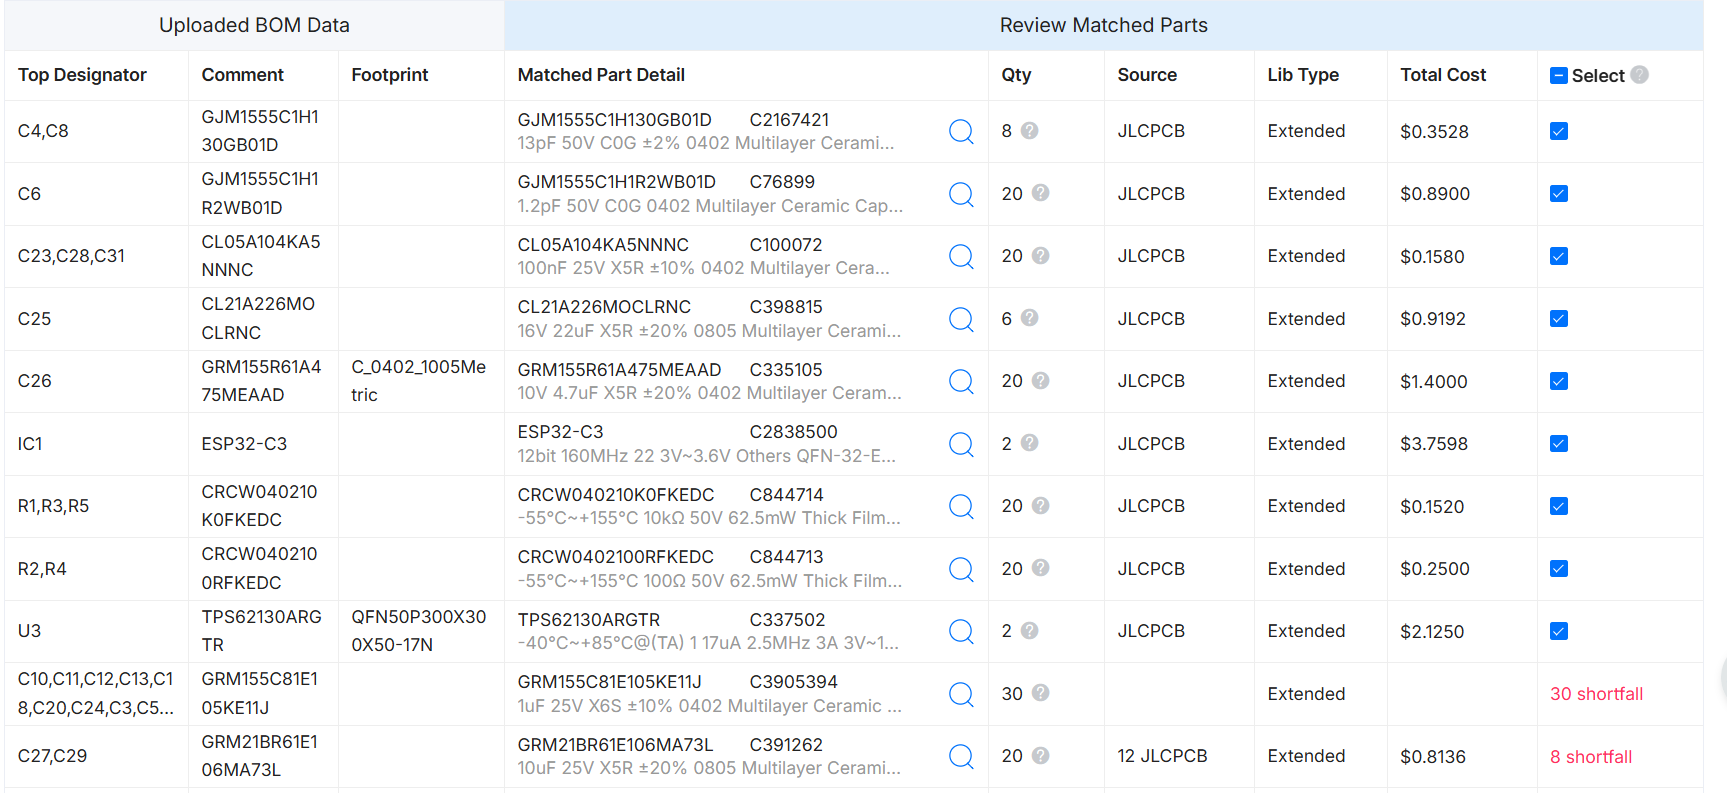
Figure 14. Uploaded BOM data for component selection
Step 10: Confirm Component Placement, Then Order
The last step is to review the placement preview. JLCPCB shows your board with every component positioned according to the CPL you uploaded. Check that the designators and orientations look correct.
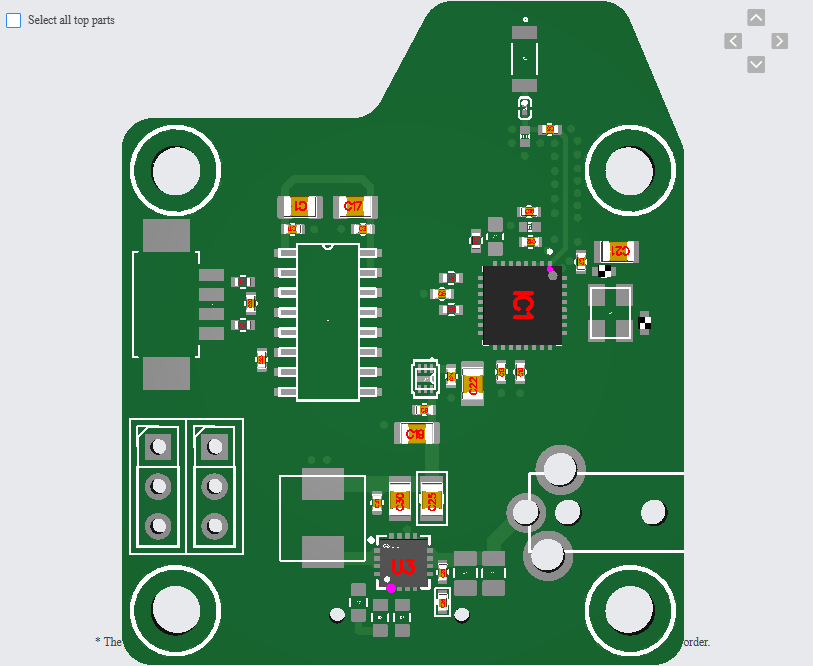
Figure 15. Final PCB Assembly processed image
Once the placement looks right and your parts are matched, you're ready to place the order. That's it, your Flux.ai design is on its way to becoming an assembled board.